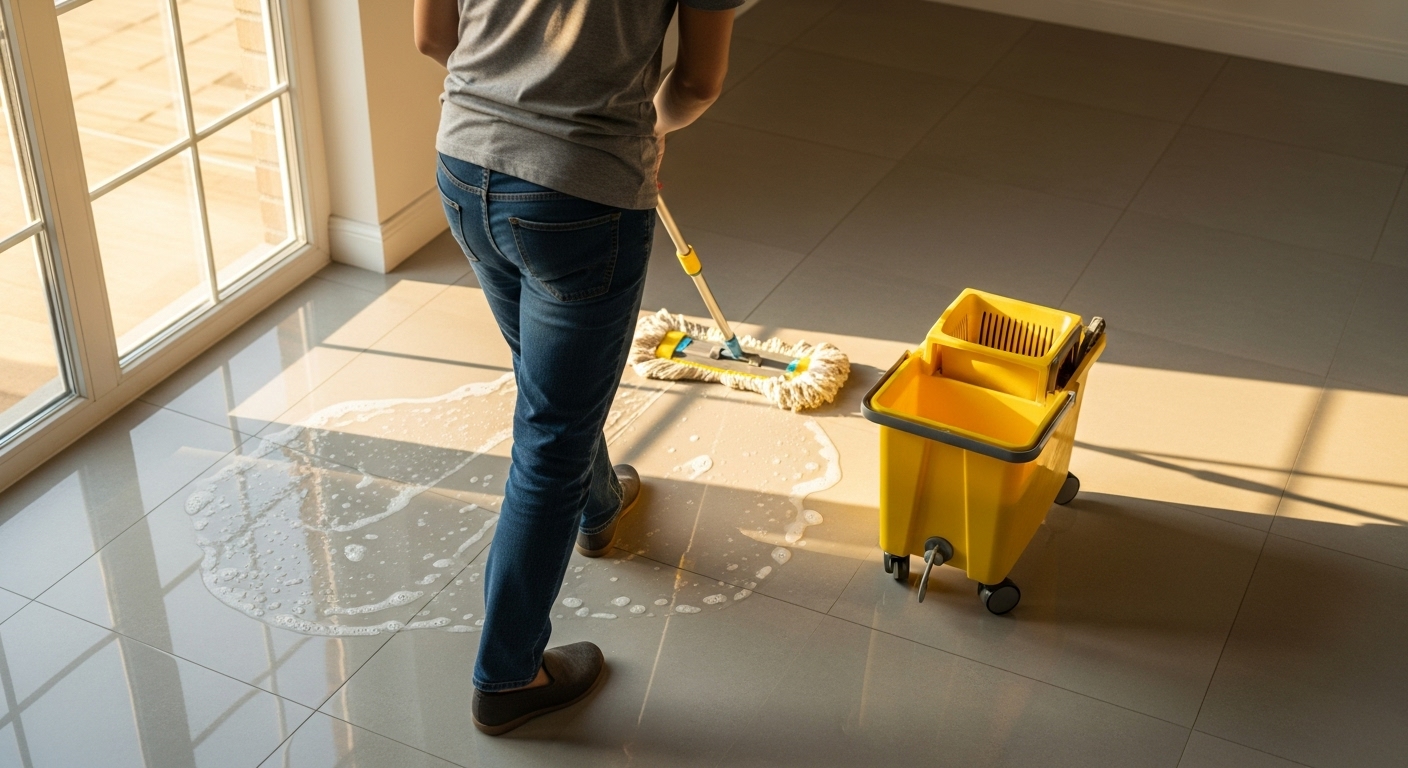
Mopping should make your floors feel clean—not leave a sticky film, cloudy streaks, or footprints five minutes later. The biggest mistake most people make is simple: too much water + too much cleaner + a dirty mop pad.
This guide breaks down the right way to mop tile, vinyl, and laminate, including water ratio tips, how to fix streaks, and dry-time tricks that actually work in real homes.
The 60-second method (if you’re in a hurry)
- Dry clean first: vacuum or sweep (never mop over grit).
- Use warm water + a tiny amount of cleaner (or plain water if your floor isn’t that dirty).
- Mop with a damp pad—not dripping.
- Work in small sections and change/flip pads often.
- Finish with a quick dry pass (clean dry microfiber) for streak-free shine.
Step 1: Always dry-clean first (this is non-negotiable)
Mopping over dust and crumbs turns into:
- gritty streaks
- muddy smears
- sticky residue
Best practice:
- Vacuum (best) or sweep thoroughly, especially along baseboards and under chairs.
- If you have pets, do a quick extra pass where hair collects.
Step 2: The “water ratio” that prevents streaks
Here’s the truth: most floors need less soap than you think. Excess cleaner dries into a film—that’s what causes haze and streaks.
A safe starting ratio (works for most homes)
- 1 gallon (3.8L) warm water
- 1–2 teaspoons pH-neutral floor cleaner
If you’re using a concentrated cleaner, start with the lowest amount on the label. More cleaner rarely means cleaner floors—it usually means more residue.
When to use plain water
Use plain warm water when:
- you mop often (2–4 times/week)
- the floor isn’t sticky
- you’re just removing dust and light grime
Plain water + clean microfiber is surprisingly effective for maintenance mops.
Step 3: Choose the right mop method for your floor type
The biggest difference between tile, vinyl, and laminate is how they handle moisture.
Tile (ceramic/porcelain)
Tile is durable, but grout holds dirt and can cause that “still looks dirty” vibe.
Best approach:
- Use a microfiber flat mop or spray mop for routine cleaning.
- For grout: occasionally do a targeted scrub (not every time).
Moisture level: medium damp is okay, but don’t flood grout lines.
Extra tip: If your grout stays dingy, it’s usually because you’re spreading dirty water. Use fresh water and clean pads more often.
Vinyl (sheet vinyl, vinyl plank, LVP)
Vinyl hates being soaked. Too much water can seep into seams and leave dull streaks.
Best approach:
- Spray mop or lightly damp microfiber.
- Avoid heavy bucket mopping unless you wring extremely well.
Moisture level: damp only (no puddles).
Extra tip: Vinyl streaks often come from cleaner buildup. Use less soap and consider a plain-water rinse pass.
Laminate
Laminate is the most sensitive here. Water can swell edges and cause long-term damage.
Best approach:
- Spray mop + microfiber pad.
- Never leave standing water.
Moisture level: barely damp.
Extra tip: If your laminate looks cloudy, it’s almost always product residue. Do a damp plain-water wipe + dry buff.
Step 4: The “two-bucket” trick (when floors are actually dirty)
If you’re deep-cleaning after a party, muddy shoes, or a long week, this matters.
- Bucket 1: clean solution (water + tiny cleaner amount)
- Bucket 2: rinse bucket (for rinsing the mop pad)
This prevents you from mopping with gray water and spreading grime.
No bucket?
Use multiple clean microfiber pads and swap them out as they get dirty. This is often cleaner than a single bucket.
Step 5: Dry-time tricks (so you don’t leave footprints)
Dry time is all about how wet you mop and airflow.
Fastest way to dry floors
- Mop with less water
- Turn on a fan (even a small one helps)
- Open windows if humidity is low
- Work in sections so you’re not walking over wet areas
Pro tip: “Dry buff” pass
After mopping a section, take a clean dry microfiber pad (or dry towel under your foot) and do a quick pass.
This:
- removes extra moisture
- prevents streaks
- makes floors feel cleaner under bare feet
Streak fixes (what to do when it looks worse after mopping)
Problem: Cloudy haze after drying
Cause: Too much cleaner or dirty water.
Fix:
- Do a second pass with plain warm water (damp microfiber).
- Dry buff immediately.
Problem: Sticky floor
Cause: Cleaner residue (or using too much product).
Fix:
- Plain-water rinse mop (damp), then dry buff.
- Next time: cut cleaner amount in half.
Problem: Visible streak lines
Cause: Overwet mop + uneven drying + dirty pad.
Fix:
- Use a clean pad, wring better, and work in smaller sections.
- Make your final pass in one direction (like painting).
Problem: Floor looks dull
Cause: Built-up film over time.
Fix:
- Plain-water rinse mops over a few sessions.
- Avoid mixing random cleaners (they can layer residue).
Cleaning tips that make a huge difference
- Change pads often: one pad per kitchen is normal.
- Skip fabric softener on microfiber (it ruins absorbency).
- Wash microfiber with mild detergent and air dry if possible.
- Don’t “save” dirty mop water for later—fresh water wins.
A simple weekly routine (realistic)
- Daily / every other day: quick vacuum/sweep high-traffic areas
- 2–3× per week: spray mop vinyl/laminate, or light damp mop tile
- 1× per week: deeper mop + edges/baseboards
- 1× per month: grout spot-clean (tile) or a plain-water “reset” rinse (vinyl/laminate)